Demo Reel
Breakdown
It takes an army of people to produce the games I have been apart of, and I never want to take credit from others. Below is a breakdown of each of the shots in my demo reel, in an effort to outline exactly what I contributed, and some of the challenges and highlights of each. Thank you very much for watching, and if you have any questions at all, please feel free to contact me.

In this opening shot of the game, I rigged all of the characters shown, including the main hero, Captain Price. The rubber gas mask is using dynamic bones, which were unique to this spin of the engine. The dynamics react with the environment and looked great, and added a real 'next gen' detail to this remastered scene.

This shot contains a very particular asset I wanted to showcase. The cloth mask pulled up over the player's face needed to use as few bones as possible, as the character was very close to the bone ceiling. While being limited on the number of bones we could use, the mask needed to fold up and crumple, without being a mess of jagged polygons, which is typically what happens when you skin fabric meshes with very few bones. I came up with a technique that held up really well. It would be a bit lengthy to describe here but please feel free to ask if you'd like to know how it was done.

In this scene, I created a rig for the missile racks. This is one of two missile racks using a similar design but different tracks. Because I knew I would have to do this twice, I automated the creation of the rig requiring only an input spline for the track and locators placed in the center of the wheels. Once completed, the animator had a master control which would animate the missile carts along the track, as well as additional controls for adding overlapping motion to any of the components.

This ship engine had much more articulation than what ultimately appeared in the final scene. The animation rig allowed the engine and all the 'petal' pieces to articulate like the turbine on a modern fighter jet. The animation eventually settled on simply having the plates and lattice structure of the engine vibrate and rumble.

I rigged the grapple launcher in this sequence, which had some very interesting requirements due to being compressed into a small crate. The legs relied on aim constraints and driven keyframes for controlling their articulation. I like to bake in the large rig motions while allowing the animator to animate over the top of it, or ignore it entirely if they decide to go a different direction.

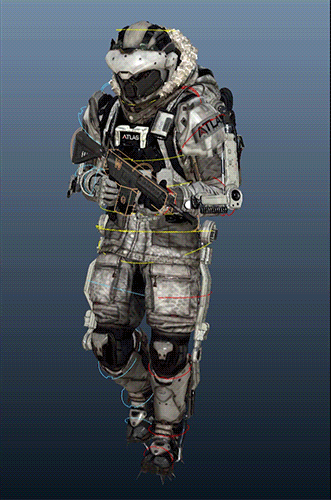
In this shot, I rigged the player's VTOL fighter, covered in plates which subtly animate as it changes form. The cockpit also has fully articulating throttle, flight stick, switches, and screens, which were sadly not visible in game.

The arm mounted grapple weapon was a fun challenge which combined both first and third person gun systems, allowing the animations to play and be visible on both the player and allies. It took a bit of planning but I knew sharing would gain us a lot of flexibility if the design changed. In addition to the rig needing to straddle those two situations, the first person weapon system is one of the most complex areas of the engine you can work with

In this scene, I rigged every piece visible. From the Aircraft, its destructible wings, and the laser crate used to rip them off. To the player, your ally, the drone, and its ropes and parachutes. I think this sequence is one of the coolest scenes I have worked on.

This sequence combines every piece of our pipeline. The characters are animated using Raven's own animation rig, as well as the sonic device the player plants into the bridge. We used an off-the-shelf rigid solver for the bridge named Pull-Down-It, which we found works more reliably than Maya's native rigid solvers.
Tools, Rigs, and Utilities
Synoptic Character Picker
This utility is one of the most complex and flashy utilities I have created. With this tool, I wanted to create a clean looking, flexible, and customizable graphic utility. The easiest solution would have been to hover invisible boxes in front of a background image, but I wanted much more control over the look of the clickable regions than an approach like that would have provided. What I ultimately came up with has worked beautifully, and I am really pleased with the result.
How Does it Work?
This is more technical than most people will need to know, but I wanted to offer some details about how it works under the hood. The UI uses a layered inheritance setup that results in two parts, the generic graphics logic, and the application specific code. This allows any application that supports PySide to use this utility, and all you need to do is provide hooks to the generic events in the graphics class with the functions of that particular application. Once that is completed, the next step is to enter Photoshop and start designing your layout. There is one hidden detail in this step isn't visible to the user. In addition to the nicely shaded image shown to the end user, there is a solid color layout that is stored in memory. When the user clicks on a part of the UI, the code fetches the X and Y position of the pixel, finds the corresponding pixel on this solid color image, and returns that section's internal object to the interface. The rest is simply making a lookup table of RGB values and clickable regions.
Technical Details
Built entirely in PySide using a subclassed and modified version of the graphic interface classes.
User can single click or paint their selections.
Modifier Keys can be used to add or remove from the selection.
Each selectable region has complete control over its behavior. For example, Single Clicking the grey region outside of the character will drop all selections, double clicking will select all keyable pieces of the rig, and drag clicking will not perform any action.
Each region can also change its shaded color. e.g. when an arm is in IK, selecting the upper arm regions will select the pole vector and shade blue, while selecting the forearm or wrist will select the ik controller and also highlight blue.
Additional Examples
Here are some additional UIs which use the same system, as well as a shot of it running Modo when I animated for Trollbridge. This is a great example of how the UIs are divided into generic and application specific layers, allowing simpler translation to other applications.
The Raven Rig
As a studio, Raven Software typically works on several projects at once. Each studio that we work with already has their own pipeline, animation tools, and character rigs. In an effort to improve our Animation Team's efficiency, I created a modular animation rig which works across the various projects, engines, and numerous skeleton variations, allowing the animators the use a single, familiar rig and toolset. The Raven Rig is the result of that effort, and has grown into a very modular and flexible design. The last several years of Raven's work has exclusively used this rig for all first and third person animations, and it has held up amazingly well.


Modo Tools
Below is both the code source and images of a Doom 3 model exporter and importer that I created, once the new TD SDK arrived. This was a really fun project because it encompassed many different coding realms such as file parsing and output, object and data structure, and PySide UI creation. I included an image of the very first model you see in Doom 3, which is the drop ship that delivers you to Mars. The other screenshot is of the Modo Chicken in Radiant, the Doom level editor. I included the code for the whole project, to offer a peek at my coding style.
/doom/
main.py
md5.py

/lxserv/
idTechWrapper.py
Modo Python Series
About a year ago, I created a short series of videos that explain some of the basics of working with Python in Modo. The videos ended up being much more broad in scope and cover a lot of general Python. The hope is to expand the series and show how to create some Modo specific tools and utilities, and eventually even PySide UIs. I was even contacted by James Darknell, who encouraged me to pursue creating more training. I have some fun ideas for what I could cover, which I hope to create soon.
https://vimeo.com/album/3701050
Trollbridge
For the last two years I have been helping with the Trollbridge film project. It was a great opportunity to use Modo in a serious production setting, and made me really love and respect some of the design and system choices made by the developers. For the project, I rigged the two characters shown below, as well as four animation shots. The characters used the ACS2 system by Lukasz Pazera, and the face rig created by Christian Bloch.
